Do you ever struggle to find a makeup remover that’s both effective and gentle on your skin? Most commercial makeup removers are either too harsh or come with a long list of unpronounceable ingredients. But what if you could make your own? DIY makeup remover recipes are a lifesaver—not only are they natural and skin-friendly, but they’re also incredibly cost-effective. Let’s dive into some tried-and-true methods to help you achieve clean, makeup-free skin at home!
Table of Contents
1. Benefits of DIY Makeup Removers
Switching to DIY makeup removers isn’t just a trendy idea; it’s a lifestyle upgrade with countless benefits. Here’s why:
A. Control Over Ingredients
One of the biggest advantages of making your own makeup remover is knowing exactly what’s going onto your skin. You can choose natural, non-toxic ingredients tailored to your skin type, avoiding harsh chemicals found in many store-bought options. This is especially crucial for individuals with sensitive or allergy-prone skin.
B. Cost-Effective Solution
Why spend money on expensive makeup removers when you can make your own at a fraction of the cost? Many DIY recipes use ingredients you already have at home, such as coconut oil, olive oil, and aloe vera. By opting for DIY, you’ll save money while achieving the same—if not better—results.
C. Customization for Skin Types
DIY makeup removers can be customized for different skin types:
- Dry skin? Add hydrating ingredients like aloe vera or vitamin E.
- Oily skin? Incorporate non-comedogenic oils like jojoba oil.
- Sensitive skin? Stick to hypoallergenic options like chamomile-infused water.
This level of personalization ensures your makeup remover works with, not against, your skin.
D. Gentle and Nourishing
Unlike commercial removers that can strip your skin of its natural oils, DIY removers often include ingredients that nourish and hydrate your skin while cleansing. This dual action leaves your face feeling refreshed and healthy.
E. Eco-Friendly Alternative
By creating your own makeup remover, you reduce reliance on products packaged in plastic or containing synthetic ingredients. This simple switch supports sustainability, making it a win for your skin and the environment.
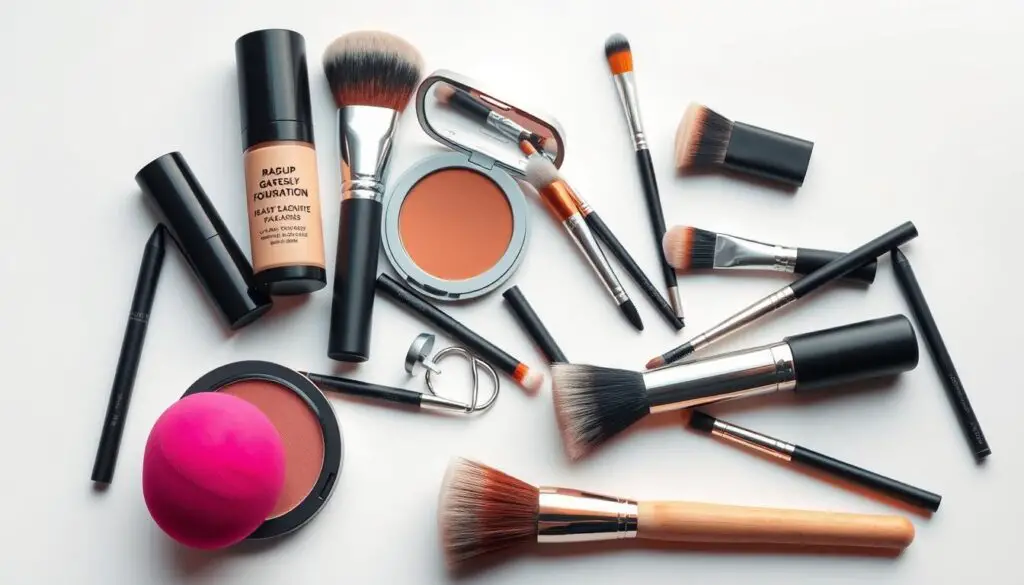
2. Ingredients You’ll Need
Crafting your own makeup remover doesn’t require a trip to a specialty store. Most recipes involve everyday ingredients that are both affordable and effective. Here’s a closer look at the essentials:
A. Oils for Makeup Removal
Oils are the cornerstone of most DIY makeup removers because they break down makeup effortlessly. Some popular options include:
- Coconut oil: Excellent for removing stubborn makeup while moisturizing the skin.
- Olive oil: A pantry staple that dissolves even waterproof makeup.
- Jojoba oil: A lightweight option, ideal for oily or acne-prone skin.
B. Soothing Additives
To enhance the gentleness of your DIY remover, consider these calming ingredients:
- Aloe vera gel: Hydrates and soothes irritated skin.
- Witch hazel: A natural astringent that helps tone the skin while removing makeup.
- Rose water: Adds a subtle fragrance and extra hydration.
C. Hydrating Components
Skin often needs a hydration boost after makeup removal. Incorporate:
- Glycerin: Attracts moisture to the skin.
- Honey: Adds a gentle cleansing and moisturizing effect.
D. Extras for a Spa-Like Touch
For a touch of luxury, add:
- Essential oils: Lavender, chamomile, or tea tree oils can provide skin benefits, but use sparingly.
- Vitamin E oil: Acts as a preservative and nourishes the skin.
E. Tools You’ll Need
- Cotton pads or reusable wipes: For applying the remover.
- Glass containers: To store your mixture safely without the risk of contamination.
- Measuring spoons and a small whisk: For accurate measurements and thorough mixing.
With these ingredients and tools, you’re all set to create a personalized makeup remover that’s effective, gentle, and eco-friendly!
3. How to Make a DIY Oil Cleanser

The oil cleansing method is a time-tested way to remove makeup while nourishing your skin. Oils dissolve oils, which is why this technique is especially effective in breaking down makeup, dirt, and excess sebum. Here’s a simple recipe to get started:
A. Ingredients
- 2 tablespoons of olive oil or jojoba oil
- 1 tablespoon of castor oil (optional for deep cleansing)
B. Steps to Follow
- Combine the oils in a small bowl or bottle and mix well.
- Apply a small amount of the mixture to your fingertips.
- Massage it into your skin in circular motions, focusing on areas with heavy makeup.
- Use a warm, damp washcloth to gently wipe off the oil and makeup.
This method not only cleanses but also leaves your skin soft and hydrated, eliminating the need for additional moisturizers.
4. Coconut Oil Makeup Remover
Coconut oil is a multitasking beauty essential that works wonders as a makeup remover. It’s particularly effective on waterproof and long-wear makeup.
A. Why Coconut Oil?
Coconut oil is naturally antibacterial and hydrating, making it ideal for dry or sensitive skin. Plus, its semi-solid consistency is easy to work with.
B. Simple Steps
- Scoop a small amount of coconut oil (about a teaspoon) into your palm.
- Warm it between your hands until it melts.
- Gently massage it onto your face, paying extra attention to stubborn eye makeup.
- Wipe off with a soft, damp cloth or a cotton pad.
For an added touch, mix coconut oil with a drop of lavender essential oil for a soothing experience.
5. Aloe Vera and Witch Hazel Mix
If you prefer a non-oily option, this aloe vera and witch hazel combination is a great alternative. It’s gentle enough for sensitive skin yet powerful enough to remove makeup effectively.
A. Benefits of Aloe Vera and Witch Hazel
- Aloe vera: Soothes and hydrates the skin.
- Witch hazel: Acts as a natural toner and helps in makeup removal.
B. Recipe
- 2 tablespoons of aloe vera gel
- 1 tablespoon of witch hazel
- A few drops of rose water (optional for fragrance)
C. Directions
- Mix all the ingredients in a clean bowl.
- Pour the mixture into a small, reusable bottle.
- Shake well before each use.
- Apply to a cotton pad and swipe across your face to remove makeup.
6. DIY Micellar Water Recipe
Micellar water is celebrated for its gentle, water-based formula that effectively cleanses and removes makeup without harsh ingredients. Creating your own micellar water at home is surprisingly simple and allows you to avoid the alcohol, sulfates, and other additives commonly found in commercial brands. By using natural ingredients like purified water, hydrating glycerin, and soothing essential oils, you can craft a customized, skin-friendly cleanser that refreshes and nourishes your skin while maintaining its natural balance.
A. What You Need
- 1 cup of distilled water
- 2 tablespoons of witch hazel
- 1 teaspoon of glycerin (for hydration)
- A few drops of essential oil (optional)
B. Steps
- Combine all ingredients in a glass bottle with a tight lid.
- Shake well before each use.
- Apply to a cotton pad and gently wipe over your skin.
This DIY micellar water is perfect for a quick and easy cleanse without the need to rinse afterward.
7. Makeup Remover for Sensitive Skin
Sensitive skin needs gentle, nourishing care, which is why a DIY makeup remover should focus on soothing, hypoallergenic ingredients. Opting for natural components like aloe vera, chamomile extract, and coconut or almond oil can help dissolve makeup while calming irritation and maintaining the skin’s moisture barrier. By crafting your own makeup remover, you can avoid harsh chemicals, fragrances, and preservatives, ensuring a safe and effective cleansing experience tailored to your skin’s unique needs.
A. Ingredients to Consider
- Aloe vera gel
- Chamomile tea (cooled)
- Jojoba oil (a non-comedogenic, lightweight oil)
B. Recipe
- Brew 1 cup of chamomile tea and let it cool.
- Mix with 2 tablespoons of aloe vera gel and 1 teaspoon of jojoba oil.
- Store in a glass container in the refrigerator for up to a week.
This gentle formula calms redness and irritation while effectively removing makeup.
8. Travel-Friendly DIY Options
When you’re on the go, convenience is key. DIY makeup remover wipes are a fantastic solution.
A. How to Make DIY Wipes
- Cut soft paper towels or reusable cotton pads into small squares.
- Soak them in your favorite DIY remover (e.g., coconut oil or micellar water).
- Store them in an airtight travel container.
These wipes are compact, mess-free, and perfect for travel!
9. Tips for Storing Your DIY Remover
Proper storage is crucial for ensuring your DIY makeup remover stays fresh and effective.
A. Use Glass Containers
Glass jars or bottles are ideal as they don’t interact with the ingredients like some plastics might.
B. Add Natural Preservatives
- Add a few drops of vitamin E oil to extend the shelf life.
- For water-based recipes, refrigerate them to prevent bacteria growth.
C. Label and Date
Always label your container with the date of preparation to keep track of freshness.
10. Common Mistakes to Avoid
When creating DIY makeup removers, steer clear of these pitfalls:
A. Skipping a Patch Test
Always test a small amount of the remover on your wrist or behind your ear to ensure there’s no allergic reaction.
B. Overloading on Oils
Using too much oil can leave your skin feeling greasy. Stick to the recommended amounts.
C. Ignoring Proper Cleansing
DIY makeup removers work wonders, but always follow up with a gentle cleanser to ensure no residue remains.
By following these guidelines, you’ll maximize the benefits of your homemade remover and keep your skin healthy and happy!
11. How to Use DIY Makeup Removers
Knowing how to properly use your DIY makeup remover ensures you get the best results without overworking your skin. Here’s a step-by-step guide to help you incorporate your homemade solution into your routine.
A. Prepare Your Skin
Before applying your DIY makeup remover, always wash your hands thoroughly to prevent transferring dirt, oil, and bacteria to your face. Clean hands ensure that you’re not introducing unwanted germs to your skin, especially in sensitive areas like the eyes. If you’re wearing heavy or waterproof makeup, take an extra step by gently dabbing some warm water on your face first. The warmth helps loosen the makeup, making it easier to break down and remove, so your makeup remover works more effectively and with less friction on the skin. This pre-step can make a big difference in achieving a clean, smooth finish.
B. Apply the Remover
- For oil-based removers: Take a small amount on your fingertips and gently massage it onto your face in circular motions. Focus on areas like the eyes and lips where makeup tends to be more stubborn.
- For water-based removers: Soak a cotton pad or reusable cloth with your DIY mixture and swipe it across your face. Avoid rubbing too hard, especially around sensitive areas.
C. Remove Residue
After applying your DIY makeup remover, use a damp washcloth or a fresh cotton pad to gently wipe away the dissolved makeup. Make sure to wipe in soft, upward motions, being careful around delicate areas like your eyes. It’s important to ensure that you remove all traces of the makeup remover, as any leftover residue can clog pores, leading to breakouts or irritation. If you’re using an oil-based remover, you might want to rinse your face with lukewarm water afterward to ensure all the product is gone, leaving your skin feeling fresh and clean.
D. Follow Up With a Cleanser
Even the most effective makeup removers can leave behind small traces of makeup, oil, or product residue. To ensure your skin is thoroughly clean, follow up with a gentle facial cleanser that suits your skin type. This step helps remove any remaining impurities, ensuring your pores are clear and your skin is fresh and balanced. Look for a cleanser with mild ingredients that won’t strip your skin of its natural oils, helping to maintain hydration while ensuring a deep cleanse. This final step in your skincare routine will leave your face feeling completely refreshed and ready for the next steps in your skincare regimen.
E. Moisturize
Finish your routine with a moisturizer to lock in hydration and keep your skin soft and supple.
12. The Environmental Benefits
Switching to DIY makeup removers isn’t just a win for your skin—it’s also a victory for the environment.
A. Reduced Plastic Waste
Commercial makeup removers often come in plastic packaging that contributes to environmental pollution. By making your own and storing it in reusable glass jars, you significantly reduce plastic waste.
B. No Disposable Wipes
Disposable makeup wipes are not only expensive but also a major contributor to landfill waste. Opting for reusable pads or cloths paired with your DIY remover eliminates this waste entirely.
C. Use of Sustainable Ingredients
DIY makeup removers rely on natural, biodegradable ingredients. This reduces the environmental footprint compared to synthetic chemicals that may harm aquatic ecosystems when washed down the drain.
D. Energy Efficiency
Making your own remover requires minimal energy compared to the manufacturing and transportation processes of commercial products.
By embracing DIY solutions, you’re taking a small but meaningful step toward a greener, more sustainable lifestyle.
Conclusion
DIY makeup removers are the perfect blend of simplicity, effectiveness, and sustainability. With just a few ingredients and a little time, you can create a remover that works for your skin and aligns with your values. So why not give it a try? Your skin—and the planet—will thank you!
13. FAQs on DIY Makeup Remover
1. What is the best oil for DIY makeup remover?
The best oil depends on your skin type. Coconut oil is ideal for dry skin, while jojoba oil suits oily or acne-prone skin. Olive oil is versatile and works well for most skin types.
2. Can I use DIY makeup removers on waterproof makeup?
Yes! Most oil-based removers, like those using coconut or olive oil, effectively dissolve waterproof makeup. For tougher formulas, you may need to massage a bit longer.
3. How long do DIY makeup removers last?
DIY makeup removers typically last 1-2 weeks when stored in a cool, dark place. Adding natural preservatives like vitamin E oil can extend their shelf life.
4. Are DIY makeup removers safe for all skin types?
Generally, yes, but always perform a patch test first. For sensitive skin, stick to gentle ingredients like aloe vera and avoid essential oils unless you know they’re safe for you.
5. Can I use essential oils in my DIY makeup remover?
Yes, but use them sparingly. Stick to skin-safe options like lavender, chamomile, or tea tree oil, and avoid using more than a few drops per batch to prevent irritation.
By incorporating DIY makeup removers into your skincare routine, you’re making a choice that benefits your skin, your wallet, and the planet. These natural, simple, and effective solutions are a perfect way to elevate your beauty routine while staying mindful of what you put on your skin. Give it a try—you might never go back to store-bought removers again!